
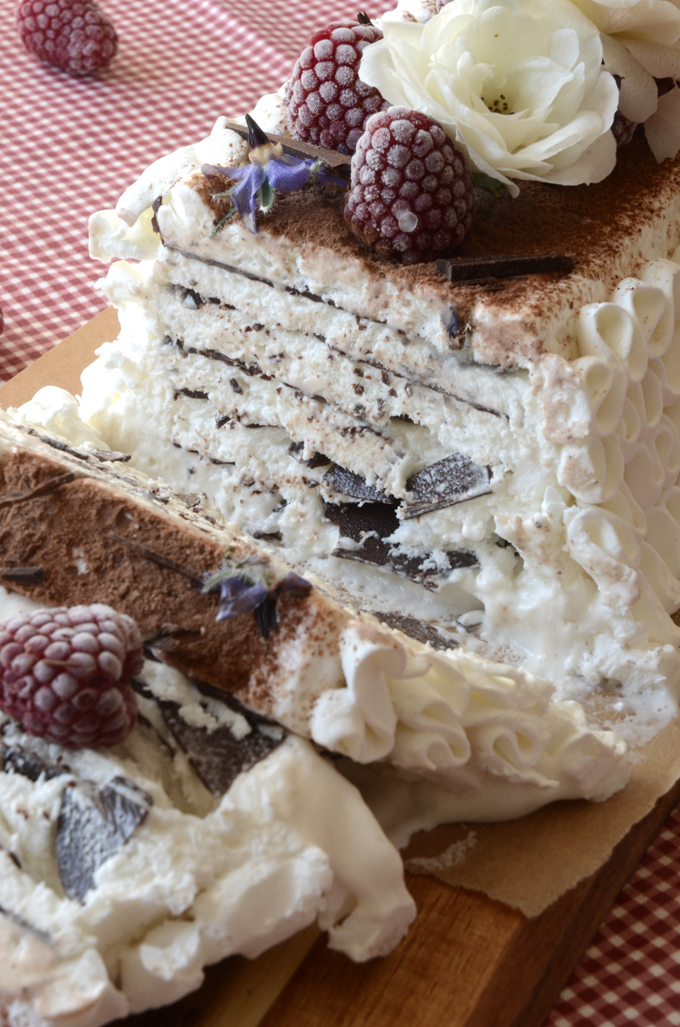

I will never forget the first time I tasted Vienetta. I was born in 1979 so I grew up in the 80’s when the ice cream revolution happened. There were only three different kinds of store bought card bard boxed ice cream available. In the world. To my knowledge. It was vanilla, ‘rainbow’ ice cream, and nougat. And then came the Vienetta. We were sitting in my sisters room with yellow, blue and gray dots on the walls. I don’t recall the occation, but it must have been something big for my parents to actually buy a Vienetta. Come to think of it, it might even have been some guests who brought it. Anyways, the packaging, the unwrapping, the curled ice cream, the crispy thin layers of chocolate, it was beyond this world.
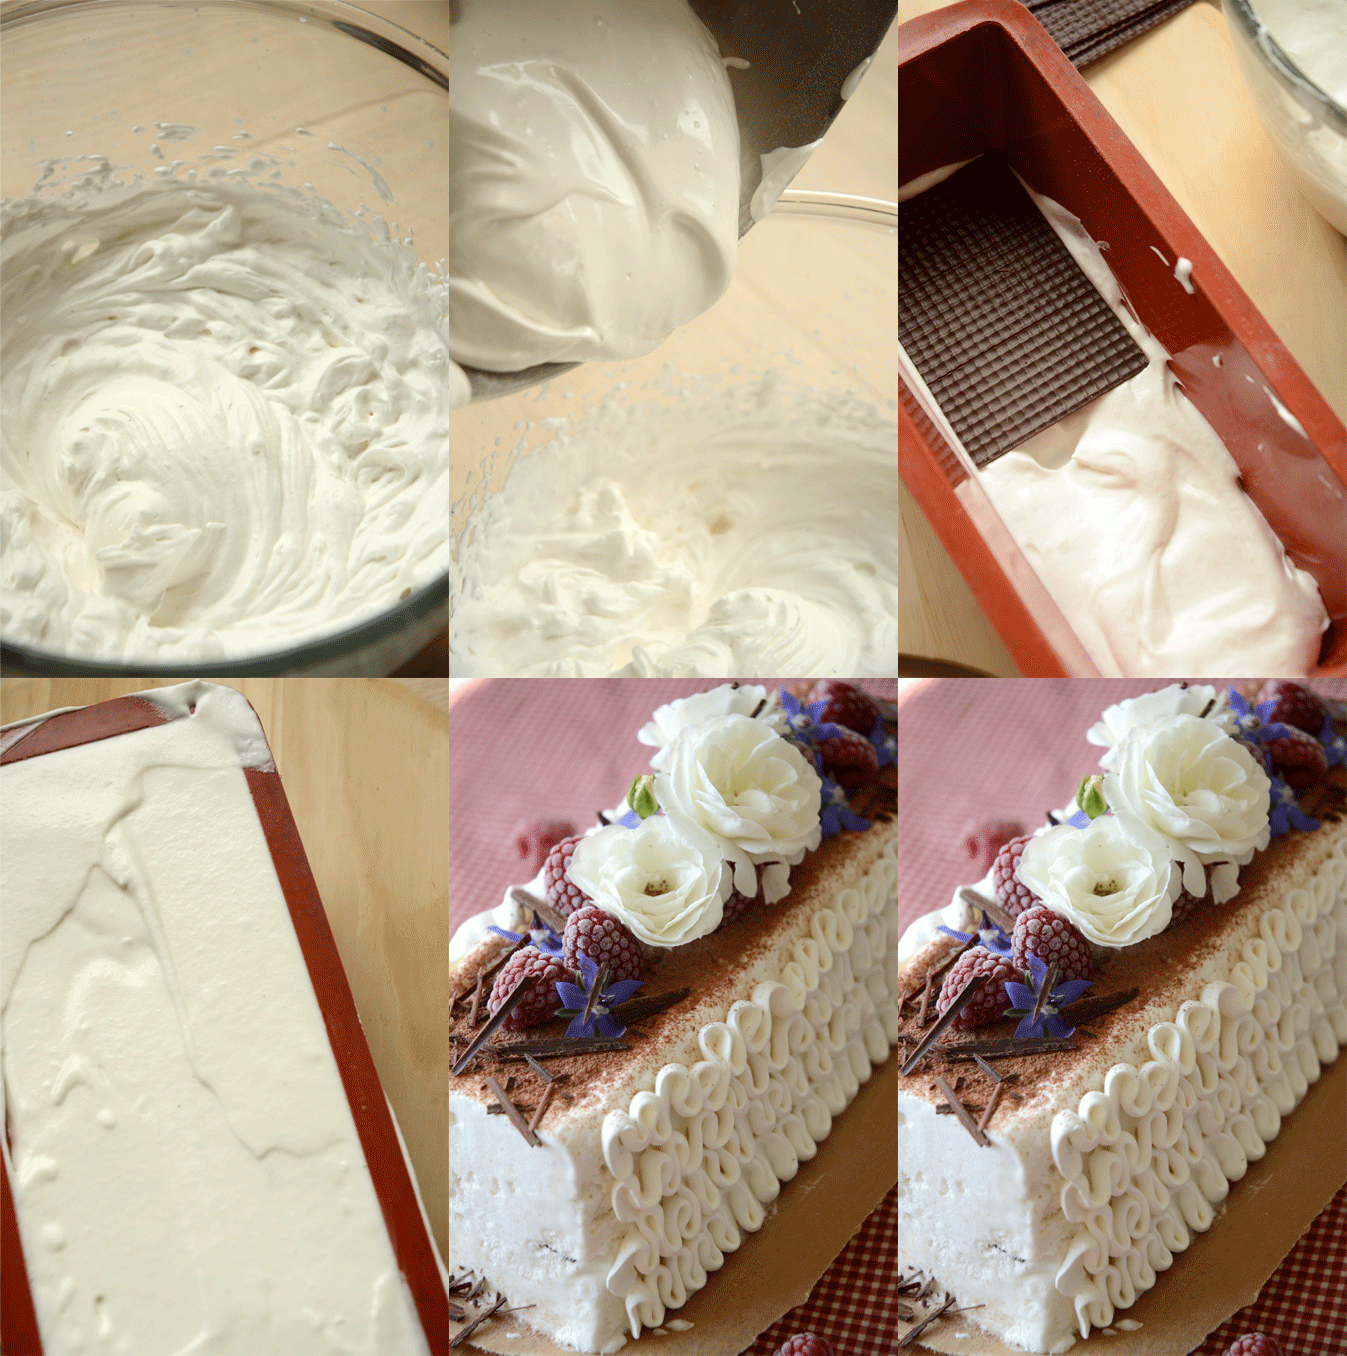
How the homemade Viennetta is made
- Whip cream
- Whip aquafaba with sugar
- Mix the two
- Layer with chocolate
- Freeze
- Decorate
Making the thin Vienetta-y chocolate layers
In Denmark we have a thing called pålægschokolade pronounced [ˈpʌ.lɛɡ.ɕo.ɡo.læː.ð̩]. And aparantly it translates to ‘sandwich chocolate thins’ or ‘Dark Chocolate Topping’ or similar. It is big, wafer thin flakes/plates (?) of crisp, dark (or milk) chocolate. It’s usually eaten on buns or rye bread preferably with butter under. It’s sort of our equivalent of Nutella. And they are perfect for our Vienetta recipe! I’ve used it in the Vienetta pictured in this post. And it is definetly the easiest way to get your chocolate layers. But since I’m pretty sure we are the only country that has it, I have included a couple of alternative options for you:
♥ Buy pålægschokolade
If you are keen on trying the palaegschokolade, the kind I use (from the brand Tom’s) is vegan. It happens to be exported to all over the world through online shops that sell Scandinavian or Danish food:
- UK: ScandiKitchen
- New Zealand: Safka – Continental goodies
- US: Nordic expat shop, Scandinavian Butik, Nordisk Import
- Australia: Danish Nordic
- Europe/Scandinavia: Scandishop, Danish Global, Coolstuff
- Arabia: Desertcart
- Denmark: Every. Supermarket. Anywhere.
Disclaimer: I have no experience with either of the above mentioned shops (nor do I make money from your purchase. I personally like to check Trustpilot beforehand to asess credibility).
♥ Use magic shell or liquid chococlate
“But Nina, how am I ever going to be able to pour it into those perfectly flat, thin layers of chocolate?” Good news – and bad: You don’t have to! And you probably can’t 😉 Luckily, perfection is not a necessity for success in this recipe. Anything that resembles thin layers of ice cold crispy chocolate will satisfy your taste buds. So don’t panic up front – you can do this! See image below the recipe. You can simply use store bought magic shell* or melt chocolate and spread it as thinly as you can in between ice cream layers.
*magic shell is chocolate that is liquid at room temperature but solidifies when frozen.
OR
♥ Make your own sandwich chocolate thins
This requires you to correctly temper a batch of dark chocolate and spreading it out thinly on either baking paper bakers acetate or the like with a spatula. If you don’t temper it properly it might be difficult to handle it after it hardens (if it hardens). Note that your homemade Vienetta doesn’t care how well your chocolate is tempered. The cold will make sure that the chocolate is hardened and makes a good *crunch* no matter how it got there … I couldn’t find one recipe that described exactly what we are looking for. But here’s a little inspiration: Making thin decorative shapes with tempered chocolate, and a little more more info on the temperering part with correct temperatures for different types of chocolate.
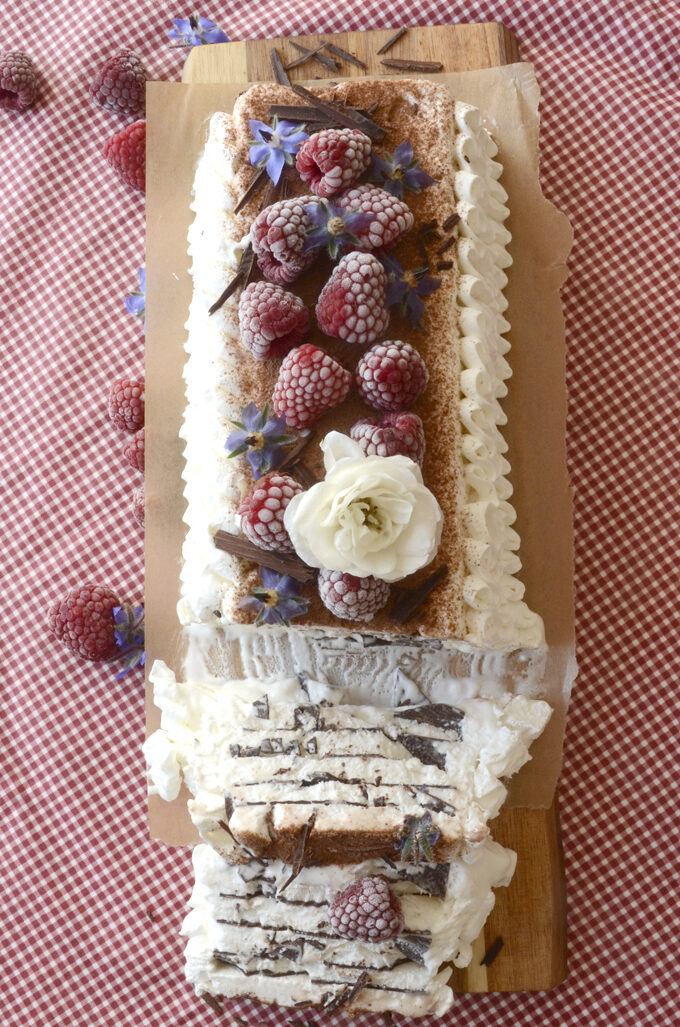
Decorating your vegan Vienetta
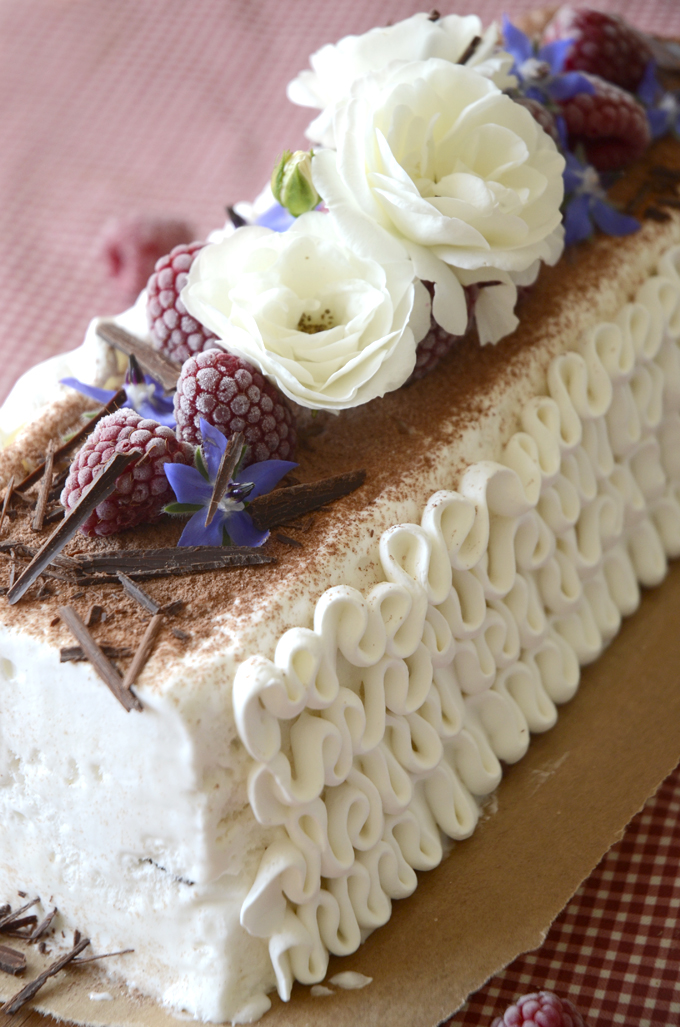
The most important thing of course being the folded-ice-cream-lookalike waves on each side. For the Vienetta noobs asking why this is important, please watch the video in the bottom of the blog post. If you are just gobbling down this sucker yourself you could skip it. But if you want it to radiate ✨🌟VIENETTA🌟✨and truly impress your guests, you know you need it.
♥ Whipped cream waves
In a narrow jar, I simply whipped 1/3C + 1tbsp (1 dl) whipping cream very stiff almost to the point of being lumpy. Then I sprayed it on with a petal nozzle (∼1cm or 1/3 inch wide) (see image below), wide side facing the ice cream. It was my first attempt, and it went very quickly, since I didn’t know if it would melt. So don’t be discouraged if you think it looks hard. Look closer, it is nowhere near perfect! You pipe it on just before serving. If you freeze it after decorating, it will taste somewhat crystallized. Neither a catastrophe nor a pleasure to eat. So if you don’t have the option to decorate right before serving, this as an option.
♥ Top decoration
Besides the whipped cream I decorated my Vienetta with what you see here:
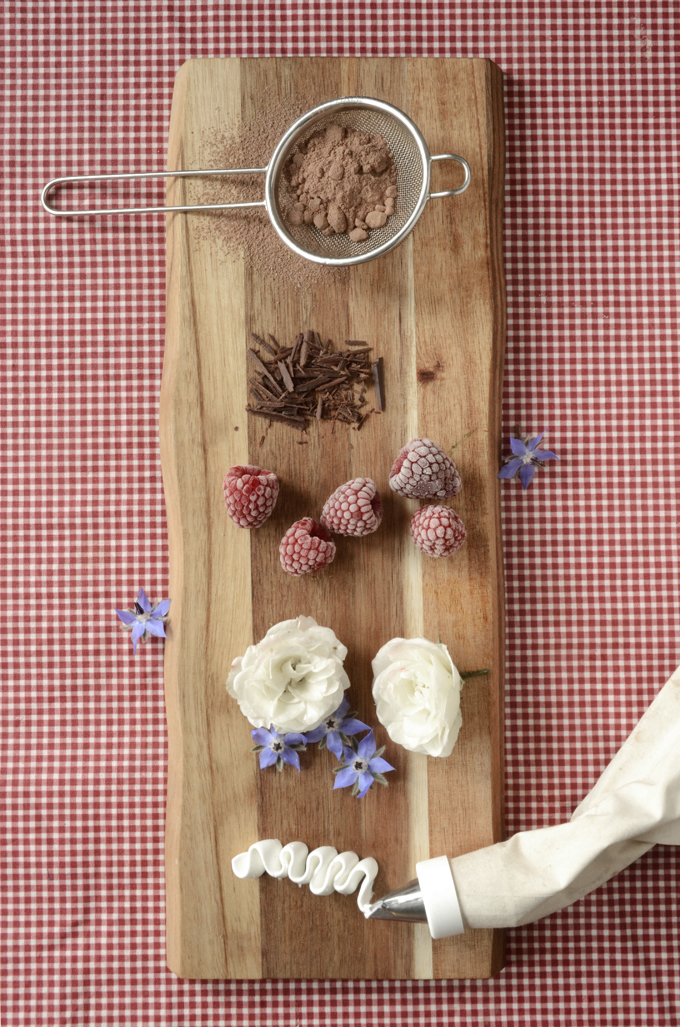
- A sugary chocolate powder mix that I sifted on top
- Chocolate flakes made by scraping a chocolate bar with a potato peeler
- Frozen berries
- Whatever edible (or at least non-poisonous) flowers you have acces to.
What sugar to use in the Viennetta recipe
I prefer to grind my light brown cane sugar and a coffee grinder and that way making my own icing /powdered sugar. I tried making the ice cream with regular granulated sugar (which is white, small but not pulverized crystals that are bigger than caster sugar crystals). The problem with using this size of sugar grains is that you have to whip the aquafaba a very long time for the sugar to dissolve. This results in a very fluffy almost stiff meringue that makes for a very light and not very dense ice cream. So I recommend powdered sugar. Caster sugar might very well work, but we don’t have it readily available in Denmark, so I haven’t tried it myself. If you try it, pay attention to the consistency of the meringue and please let me know in the comments how it went 🙂 To learn the differences in the sugars I’m talking about, go to THIS elaborate, illustrated sugar explaining post.
The aquafaba
I used aquafaba from chickpeas in the recipe and there is not a hint of beans left in the final Vienetta. If you are afraid to have a beany taste, you can always go for a lighter bean such as lima, butter bean, white beans etc.. They generally taste less beany. If you have a fairly gooey aquafaba there is no need to reduce it. As mentioned earlier you don’t want the meringue to become too stiff or fluffy. So don’t worry about needing perfect, thick aquafaba. The consistency you get from canned beans is perfectly fine. If making your own, you might want to reduce it if it’s very watery.
The Vienetta loaf pan – size and lining
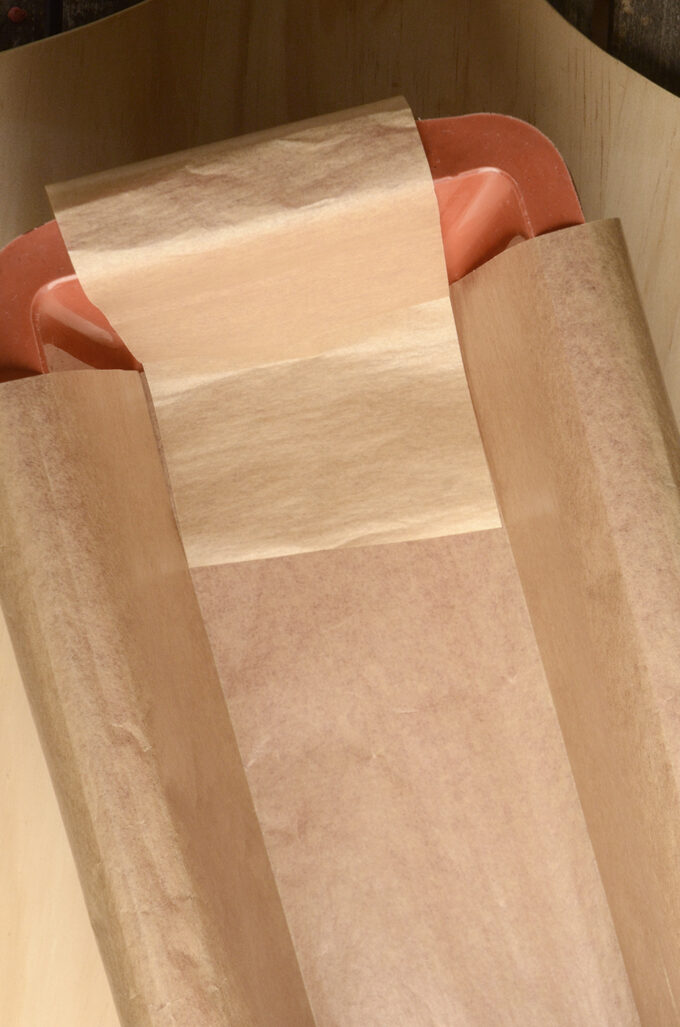
For reference my loaf pan (used in the pictures) meassures 2.75″ x 8.75″ (7 x 22cm) in the bottom and 4″ x 9.75″ (10 x 25cm) at the top. The height is 3.15″ (8cm). It is a silicone mold so if you are on a desserted island and can’t get wax paper, you could get away with not lining it. But the paper definetly gives your final Viennetta ice cream a prettier surface. And you are guaranteed that bits of ice cream wont break off when you remove it from the pan. If not using a silicone pan, you definetly need the wax paper. I used one piece of paper going across the sides and over the bottom. And two small seperate pieces that are just covering the ends. The paper is neatly folded, to better stay in place so it dosn’t move around too much when adding the ice cream mass.
3 – 2- 1 – go vegan Vienetta!
Homemade vegan Vienetta ice cream cake recipe
Redskaber
- One 6 cup loaf pan (or 1.5 Litres)
INGREDIENSER
- 1 cup (250 ml) whipping cream250 (I use Alpro Airy & Creamy)
- 150 gr icing/confectioners sugar
- 1/2 tsp vanilla sugar or extract
- 1/2 cup + 2 tbs of aquafaba
The chocolate layers, either
A) Buy chocolate thins
- 1 pack pålægschokolade (see buying options above)
B) Make your own
- Make a batch of homemade chocolate thins (follow tips in the blog post)
C) Make magic shell (or buy it)
- 3/4 cup (120 gr) dark chocolate chopped or chips (about 4 oz)
- 2 tbsp neutral coconut oil
SÅDAN GØR DU
Start by getting all the small details ready so that you pretty quickly can throw the ingredients together and get it in the freezer:
- Line your loaf pan with baking paper and make sure there's room in the freezer. Measure your aquafaba. Measure or/and make your sugar, sift it if its very lumpy. Melt your chocolate if using liquid: Chop dark chocolate rather fine and melt it Baine Marie (aka water bath). Mix in the coconut oil. Store it just above room temperature so it doesn't solidify until you need it in the recipe.… or have your bought palaegschokolade or chocolate thins ready-made. Make sure your whipping cream is chilled and pour it in a large bowl (narrow is better than very wide). And get your beaters out. Now you are ready:
The ice cream
- If you are using vanilla extract you can add it to your aquafaba and whip them together. (If using vanilla sugar (powder) you need to add it to your whipping cream instead). Whip your aquafaba. When the aquafaba is stiff – not wobbling around when you gently shake the bowl – it is ready for some sugar.Start adding the sugar 1 tablespoon at a time while whipping untill all sugar is dissolved. The final meringue mass should be glossy, fluffy and thick but still pour-able. You don't want it as stiff as for meringues. (See GIF above for reference).Now quickly wipe your beaters clean and whip the whipping cream (with vanilla powder if not using vanilla extract in step 1).Now stir the whipped cream with your spatula once to loosen it and pour the meringue on top. Fold them together using your spatula: Cut down the middle and fold it over. Twist your bowl and repeat until it looks like a uniform mass. We want them mixed but we also don't want to get rid of all the fluffiness.
– If using homemade chocolate thins or pålaegschocolate
- Scoop some of the ice cream mass into your loaf pan. It should be about 1 inch in heigtht. Even it out a bit and aim for it to be somewhere between 1/2 or 1 inch in height before adding a single layer chocolate thins. Press the chocoate down gently. Scoop over the next layer of ice cream making sure you get ice cream into all the corners and edges.
– If using liquid chocolate.
- Scoop some ice cream mass into your loaf pan, about 1 inch in heigtht. Even it out so it forms a pretty flat surface and make sure the edges go up just a little bit so the chocolate won't pour down the sides. Now take 2 tablespoons of chocolate and distribute it quickly over the ice cream. Remember, it doesn't need to be perfect just even it out a bit.Drop 2-3 scoops of ice cream on top of the liquid chocolate layer and gently even it out to make another flat layer without stirring too much into it as you might mess up the chocolate layer underneath.
Continue layering
- Continue with the rest of the ice cream and chocolate layer by layer. Make sure your last layer is ice cream. Hopefully you will have just a tiny bit excess ice cream so that you can scrape off the bottom to even it out perfectly.
Freeze
- Put the loaf pan in the freezer and let it sit for preferably 24 hours at which point it should be firm enough.
Decorate
- It's pretty light in texture, so it will melt quicker than ordinary ice cream. Therefore: Leave it in the freezer until you have all of you decoration stuf ready. Take it out just before serving to decorate (see tips regarding decorations further up in the blog post).Turn the loaf pan upside down on your serving tray and gently remove the pan. Gently remove the wax paper and there's your Vienetta! Decorate as suggested.Serve and rejoice!
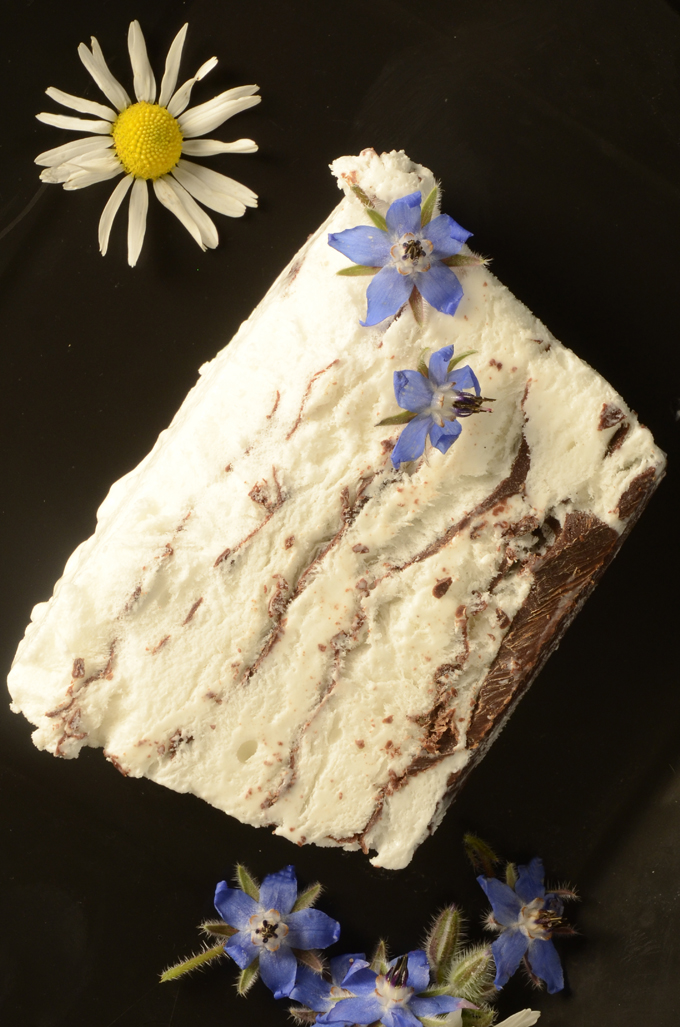
Here’s the recipe made using liquid chocolate. It was my first attempt and I didn’t cover the edges (at all) as described in the recipe. So a big part of the chocolate went straight to the bottom and settled there as you can see (I know, booh hooh, a big fat chunk of chocolate that you just HAVE to eat …). But the mouth feel of the other thin layers was very Vienetta-y!
“Ehrm … what IS Vienetta?”
For those of you who don’t know what Vienetta is: Here’s a video showing how Vienetta is produced. Bare in mind, if you already know Vienetta, watching this it is a bit like finding out (spoiler alert) that Santa doesn’t exist. I don’t know how I imagined it being made, but certainly not like this:
This is so adorable. Thank you so much. We really enjoyed it 🙂
Those chocolate thins in American English would be referred to as “sheets”. Thin chocolate sheets, or sheets of (hard) thin chocolate.
Keep up the good work, on translating your recipes! They are outstanding!
Thanks Ashley! I really DO need an assistant for the translating 😉 Hope to get there sooner or later. (The translating, I mean – probably not the assistant any time soon LOL)
All the best
Nina
Now that I think about it, I should have been more explanatory the first time. The word “sheet,” in common usage, refers to “thin layer”. If you look it up in an English dictionary, you’ll find the definition is bed linens, or pieces of paper, or something similar. When we talk about candy or chocolate, though, we use the word “sheet” to refer to “hard thin layer.” When there is a layer of hard ice covering the ground outdoors, we often refer to it as a “sheet” of ice. So sorry if I confused anyone! 🤔
OMG I’m so happy I found your website 💚 you are a Vegan-food genius
Thank you so much 😍
Hi Nina the recipe is not complete here as it mentions sugar but none are in the ingredients
You are absolutely right! To tell you the truth, I’m breastfeeding at the moment and I’ve come to realise that my brain simply does not function properly 😀 I should have one or two people check everything I publish LOL. I’ve been staring at this post for months before publishing and still managed to miss such a basic detail. It has been included now 🙂
All the best
Nina